Monday, July 13, 2015

Summer Fruit

Summertime and the living is easy... well at least that is the goal.  For me, the season is not complete without backyard barbeques, lazy days at the beach, tall glasses of iced tea, and snacking on fresh picked fruit.   

Using summer fruit salad as my inspiration, I created a few digital scrapbook pages to share with the SOC family.  As always, if you like them please feel free to download (right click & save) them for your personal (non-commercial) projects.  

Wishing you all a wonderfully fun, creative, safe and truly awesome summer.

Thanks for looking!


Friday, July 10, 2015

How do you Fuse?

Every where I turn I hear about the "FUSE". I purchased one a few months ago and finally had the chance to play. How do you FUSE? This tool allows you to create custom sleeve sizes, add waterfall sheets and secure memorabilia in a pocket. 

I have seen great projects made for Pocket Letters as well as Picture My Life so I thought I take my first swing at using it for a CTMH Picture My Life page I am put together for back to school (It will be here before you know it)....

 Here is the almighty "FUSE"....

 I gathered my page protectors, beads and CTMH PML cards. 

 I figured out which PML cards I wanted to use and placed them in the sleeves. 
I added a few embellishments i.e.. the button on the wheel, the word cloud and bow. 
I decided to fuse one of the pockets after I put a few hearts, a paper clip bow and beads in the sleeve. 

 I placed a piece of paper under the page protector (to protect my table) and placed the tip of the fuse along the groove of the ruler and pulled it toward me. This tool gets very hot so be careful. 

 If you look at the top of the pocket you can see where I fused the plastic sleeve together thus not allowing the content to fall out. LOVE IT!!

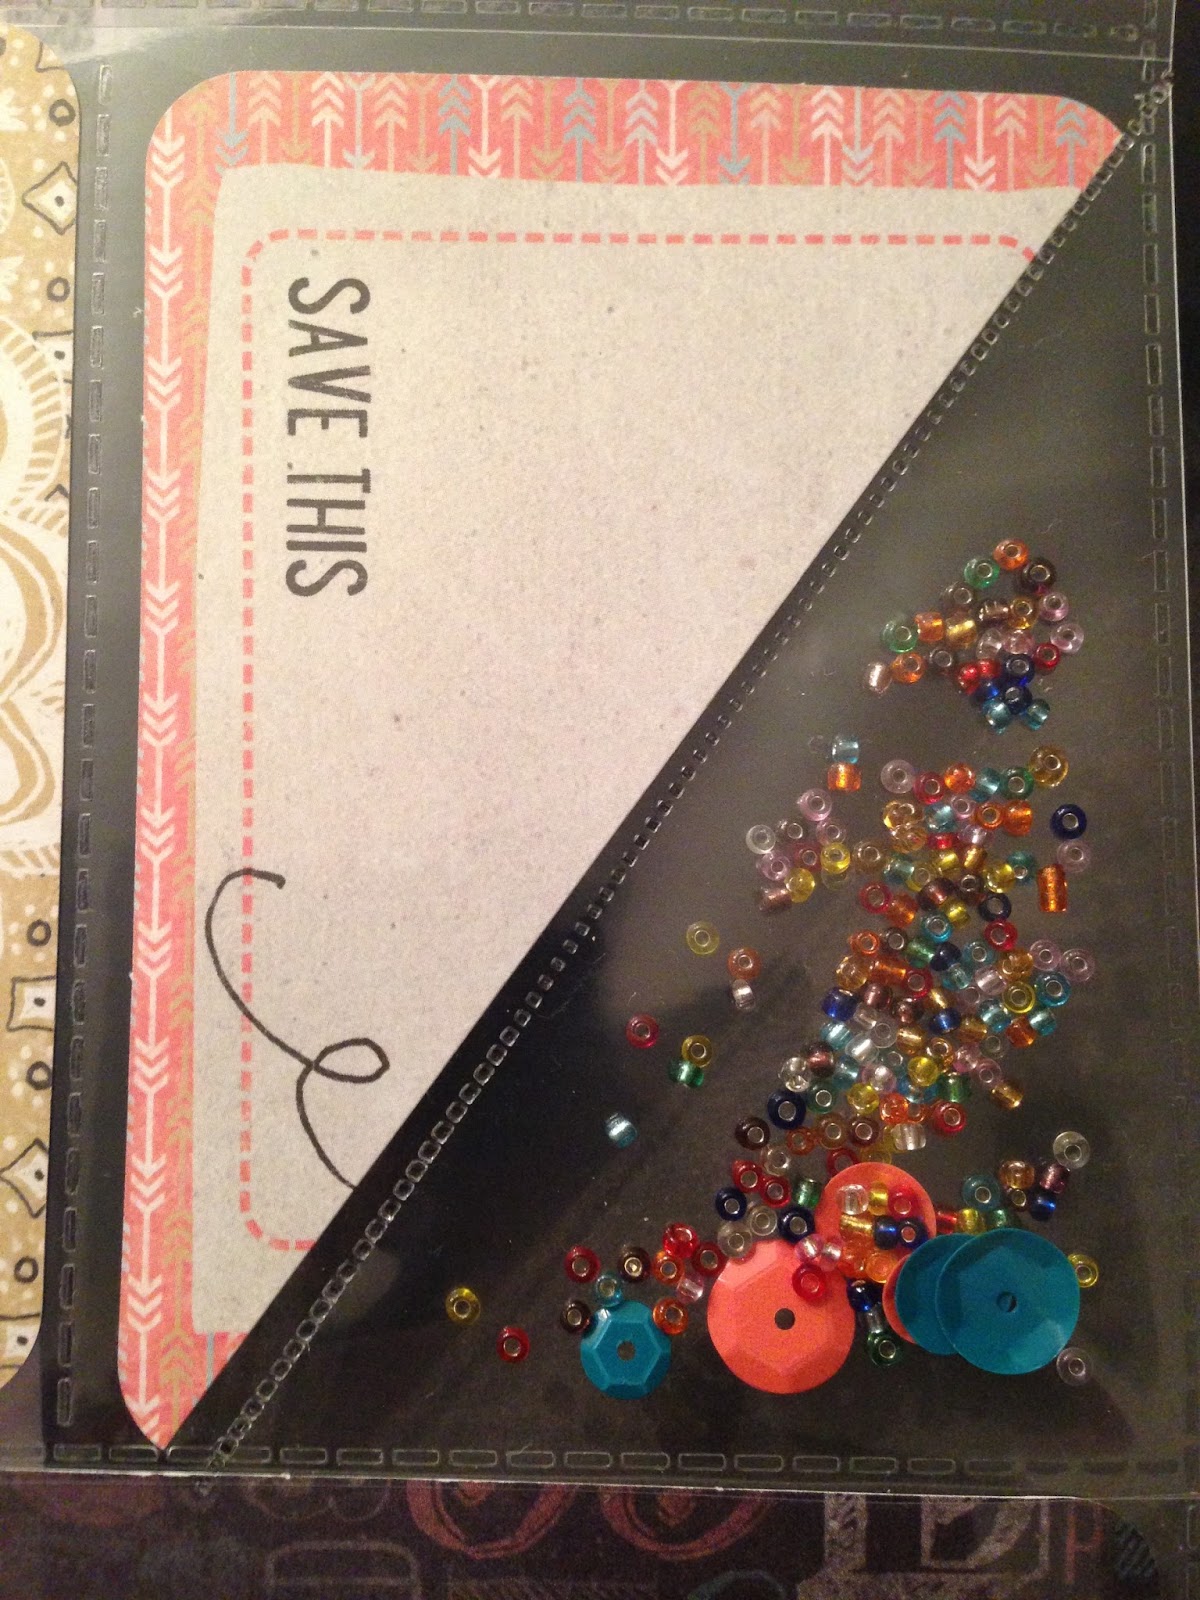
 I played around with a second pocket and cut a PML card diagonally. I placed sequence and beads in the pocket. I made sure there was a separation between the contents and the card and began to fuse. 

 I again dragged the tool toward me. I found it was easier then pulling it away from me. 

 Like magic the fun shaker pieces were separate from the PML card. 

This is my finished PML page minus a few pics and journaling I will add when the school year comes. I am sure I will get better with continuous use of this product. I give it 2 thumbs up!!

What have you made with your fuse? Comment below!!

Happy Crafting ~ Shalana

Tuesday, July 7, 2015

Denim, Lace and Pearls

Here’s my altered project using some old Levi jeans that I don’t wear anymore.  I was told to cut them into shorts and wear them around the house.  My creative side lead to my favorite project…a mini album.  The theme is Denim, Lace and Pearls.  I must admit it was fun designing, but putting holes through the denim and chip board with my crop-a-dile was fierce. Thank goodness I still had my eyelet setter.  That’s why it’s hard to let go of old tools. 

This is how I got started.  I LOVE Sookwang double stick adhesive.  It was included in a goody bag that I received when I attended a crop by Tiare last year.  My scrapping sistah Lakeisa saw me using the last strip and gave me hers.  That’s why I love crops.  We always share!
 This is how I covered the outside chipboard with the material.  The inside pages had denim on both sides.

Below are views of the album.  (See close up view of the cover) Love this scripture It is more Blessed to give than to receive.  Acts 20:35.  The blue/white lace is over the satin lace and on the wide lace that's attached to the denim. It's a lot of layering, but I love the look!
All of the items used in this mini are from my stash!  
 The left side is an interactive page for lots of photos attached together with the altered paperclip,  The right has a pocket from the binding of the jeans used to store tags, photos, journal tags, etc. I took a strand of pearls and added to the satin lace and tied a knot of lace to put behind the denim flower.
 Both left and right are interactive pages.  The denim material was used to make flowers from Tim Holtz tattered florals die cut.
I found this mini file envelope by 7 Gypsies in my stash and put pearls and a flower bud on it.

 This view shows the right side above opened.  Kind of like a gate fold page to store photos.
 Back cover using the pocket from the jeans and another flower designed with Tim Holtz die cut.
Can you imagine the possibilities of using denim on your projects?  I'm going to look around and see what else I can alter or use with the left over denim.  In the meantime, if you have something you would like to challenge me to use it with let me know.  I LOVE a challenge!  Thanks for your kind comments and love you show on my projects.  Hope you are inspired!!!

Papercrafting Princess


Monday, July 6, 2015

SOC Blogger Challenge: Anything Goes


Happy Monday everyone! I hope you all had a wonderful July 4th weekend full of fun with friends, family, food, and fireworks! Today I am stopping by with a new blogger challenge, and its everyone's favorite:


ANYTHING GOES!!
 
You know how it goes! Whether you're beating the heat with summertime projects, or everyday creations, be sure to stop by here and post a direct link to your favorite blog post in the comments below, in the blog gallery above, or over in the SOC Blogger Challenge forum. If you haven't had the opportunity to participate in the challenges this year, the challenges are a great way to share your projects with bloggers and other visitors. Providing a direct link allow others to find your projects quickly and leave a little bloggy love as well.
 
Now that we have the details out of the way, here's some great creations from our Red, White, and Blue Color Challenge:
 
 
Alice from The Purple Loft Creations shared this adorable card over in the Blog Challenge Forum! Lovely design and that little couple is just precious!
 
 
Next, Michelle made this stunning tag for the challenge! Love her vintage take in creating with the red, white, and blue!

 
I love this card Treva shared over in the challenge forum! Great paper selection, design, and I love those tiny stars!
 
 
Finally, Lois made this wonderful card! Beautiful punching and layering, topped off with that great star accent! Be sure to stop by Lois' blog to see this and other Independence Day inspired creations!

Thank all of you who participated in the challenge! It was great seeing all of your creations using the red, white, and blue! I hope all of you will come back and share in our "Anything Goes" challenge, and invite a friend! I look forward to coming back in a couple of weeks with a new challenge. Until then, take care and happy crafting!

Friday, July 3, 2015

Have a Sparkly July 4th!


Today I am sharing an Independence Day easel card.  They are super easy to make and look great displayed on a desktop.


Here are most of the supplies I used, including a free digital stamp from one of my favorite designers, Whimsie Doodles, Copic markers and glitter.


I cut the white cardstock into two pieces, a longer 4 1/4 inch by 11 inch and a 4 1/4 inch by 5 1/2 inch one.  I scored the longer one at 5 1/2 and 2 3/4 inches.

Next, I colored and embellished my digi, layered it on top of patterned paper and then to adhered it to the shorter cardstock piece.

 I took the longer cardstock piece, folded it in half and folded the smaller scored section down. 


 Next, I adhered the 4 1/4 x 5 1/2 inch base to the front of the easel card on the bottom half.


 In order for the card to stay in the upright easel position, you need to place some type of dimensional embellishment on the bottom part of the card.


There are so many different styles of easel cards out there, can't wait to try another one!  Do you have a favorite?

Thanks for stopping by!
Hugs,
Kimberly


Monday, June 29, 2015

A 4th of July Tribute


Once again, it’s July and I am asking myself “Where did the time go?”  It means summer is here and we’re hitting the road to visit family for the 4th.  This year, we’re headed to see my side of the family and celebrate my nephew’s 4th of July birthday at an indoor trampoline park.  I’m scared! 

But, last year we went to California to visit my in-laws.  They were really in the swing of things and we checked all the boxes:  red, white and blue clothes?  Check.  BBQ? Check.  My mother-in-law had even decorated the patio with patriotic wind catchers and other fun items. 

So, in honor of them and the upcoming holiday, I’m sharing a layout that’s all about them and our time together.  I took a cue from my mother-in-law's decorations and used as many embellishments as I could on the page.  I love how it turned out!


Celebrate by Moanica Caston.  Cardstock: Bazzill; Patterned paper, 3-D stickers: Pebbles, Inc.; Star Gems: Favorite Findings; Ribbon: unknown; Letter alphas: American Crafts Thickers.

Be safe and I hope you enjoy the holiday and get to spend some time with your families!
Happy 4th of July!
Moanica

Saturday, June 27, 2015

SOC Project and Cas Card

Hi There,

So I needed to make a card for someone who is going through some things health wise and I came across Deconstructed Sketch #46 and thought that is would pair well with a sentiment/image I saw on Facebook.

Hubs and daughter gave me a gift card for Christmas and I was able to purchase some MME 6x6 packs on sale 50% off.  Yes I know this goes against using my stash but the gift card was in my stash and need to be use soon.  It works out in my mind; I'm sure someone else can see the logic.

Anywho here is the original sketch...


I turned the sketch on its side and used it that way.  I also matted everything with Kraft card stock, added a lil paper lace, some flat back pearls from the stash and a lil glossy accents on the image and I was done. I think it came out cute. 

There always seems to be sentiments or quotes that I come across and think, that would be great on a card.  So in this case I printed the scripture and backed t with cereal box chipboard.  I have done this with several quotes with the intent of using them on cards or mini albums or any other project.

And there you have it, another card in the CAS series.  I really pray these cards inspire you to create with what you have around you.

Until next time...

Kelli


What I used....

~ Scripture post found on Facebook
~ My Mind's Eye, Now and Then 6x6 pad
~ Recollections Kraft and white card stock
~ Miss Elizabeth's Adhesive Lace from the $1 store
~ Brown flat back pearls

LinkWithin

Related Posts Plugin for WordPress, Blogger...