Showing posts with label mypolkadottedbliss. Show all posts

Sunday, January 4, 2015

Scrapping Mommy Memories

Hi SOC ladies!  I am excited to share my first two-page layout of 2015: my family 's trip to Houston in honor of my God-sister's graduation from her Master's program a few years ago.  It was one of the last trips we took with my parents before my mom passed away, and I recently got the urge to start documenting our travels together.  

I chose my 11" x 14" Smash Book for this layout.  The biggest challenge was pulling the different colors together, so I used very plain background papers and focused on 3 key colors: pink to match baby girl's headband and blue and green to compliment the graduate's dress.


 We had an amazing weekend celebrating my God-sister's accomplishment, from the ceremony to her wonderfully planned party.  Everyone, from the grown-ups to the kids laughed and danced their hearts out!  It was a great weekend that brought her loved ones together to wish her well.


I always like to add customized accents to my projects.  This time I played around with inking and stamping canvas butterfly shapes to top off the pages.


Thanks for letting me share a bit of my memorable trip with you!

Supplies used: Patterned paper by Heidi Swap and Close to my Heart; Paper flowers and pom pom trim by Recollections, Stamp by Unity Stamp Co; Smash Book by K & Company.

Thanks for dropping by!

Hugs,
 Kimberly 

Saturday, October 4, 2014

Trick or Treat?


Hi SOC ladies!  With Halloween right around the corner, you might need some treats for party or for teacher.  Why not try altering these petite coffee cups and filling them with goodies?  This was a very fun, easy project that you can do with the kiddos too.


I ordered the 4 oz. cups and matching lids from restaurant webstore here.  I gathered some patterened papers, embellishments, scissors and my ATG (you can use a glue stick or any paper adhesive). 


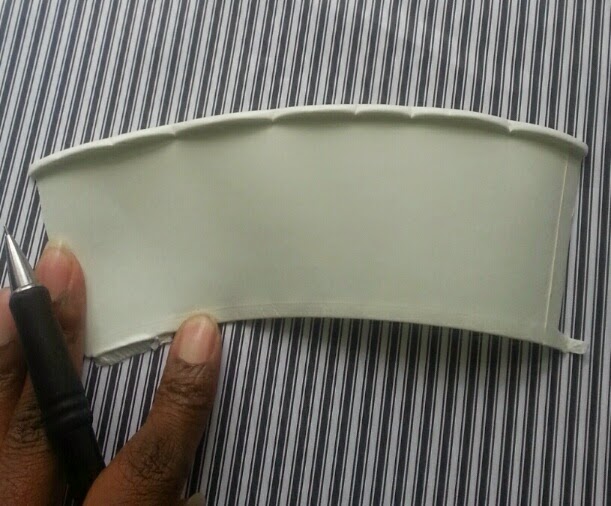
 1st, I took apart one of the cups and used it as my template.  Once I trace and cut the template on the desired patterned paper, I applied adhesive with my ATG and wrapped it around the cup.


Next, I cut paper for a straw from scrap paper, about 1.25" x 4.25 ".  Apply adhesive down one length of the strip, roll it beginning with the opposite side (I rolled mine around a thin paintbrush) and adhere the sticky side.


Then, it's time for the fun part, grab your stash of embellies and decorate the cup and lid.  I kept mine simple with ribbon and Boo labels made with the Cricut.

Fill the cup with treats and you're got a cute and spooky gift!

Thanks for stopping by! 

Hugs,
Kimberly

Monday, August 4, 2014

Back to School Pixie!

Hello SOC friends!  I hope you are enjoying a sweet summer...I know some kids are already back in school and mine only have a few short weeks left, so I am getting all their supplies together now!  Now-a-days, all the notebooks are supposed to be plain and simple, but I like to put a little handmade surprise in the backpack for each one of my babies.


Today, I'm sharing with you a mini sketch pad I altered for my tween.  This little fairy pixie is from Whimsiedoodles, isn't she adorable?   I knew she would be the perfect digistamps for this project.


I picked up a couple of notepads from the $1 spot at Target and  pulled out some ribbon, papers and my Copic Sketch Markers to match.

Some strips of ribbon softens up all those metal rings :)


I don't know about you, but coloring the hair gives me a fit.  After searching the Internet, I came across this detailed tutorial by Lydia Boode and I love her technique, so I am sharing here.   I added a little coordinating pen to to go with the pad.

 This little notebook is just the right size for my budding artist to carry with her in the car, to school and more.  Hope my girl likes it!

Do you make something special for your kids' first day/week of school?

Supplies used:  Cardstock: DCWV Nana's Kids; Ribbon; Mostly from Michaels $1 Bin;  Digistamp: Whimsidedoodles.com; Pen; Staples; Copics: Hair E15, E37, E79, E25; Pencil Y32, Y35, Y38; Pencil tip Y32 Pencil Eraser R20, R43; Skin E00, E13, E15; Dress R20, V06, V17; Shoes and headband G20, G24.

Thanks for stopping by!
{{Hugs}}
Kimberly

LinkWithin

Related Posts Plugin for WordPress, Blogger...