

Follow along with this picture tutorial and make one of your own....

You will need 3 pieces of chipboard. Two pieces cut at 4 1/2 x 8 1/2 for the front and back cover and one piece cut at 3/4 x 8 1/2 inches for the spine.

Grab a piece of patterned card stock and cut at 10 1/2 x 12 inches. Score at 1 inch on 3 sides.

Take your chipboard and use the adhesive you like best. I used double sided tape around the edges.

Lay your chipboard with the adhesive side down on top of the patterned paper using the score lines as a guide.

I added adhesive to the chipboard and drew a line from corner to corner to make it less bulky when it is time to fold the paper around the chipboard.

Cut the corners off along the penciled lines you previously drew.

Fold in the paper over the chipboard making the cover of the book. Run your bone folder down the two inside seams which will be your spine.

This is how the book looks folded.

Cut an inside piece of patterned paper at 8 1/8 x 9 5/8 to cover the exposed chipboard.

This is what it looks like once you have your patterned paper adhered to the inside.

Take your bone folder and again go along the seam so you can easily bend the book.


Cut seven pieces of card stock at 4 x 4 1/2 inches. Score the card stock on the 4 inch mark on the score board.
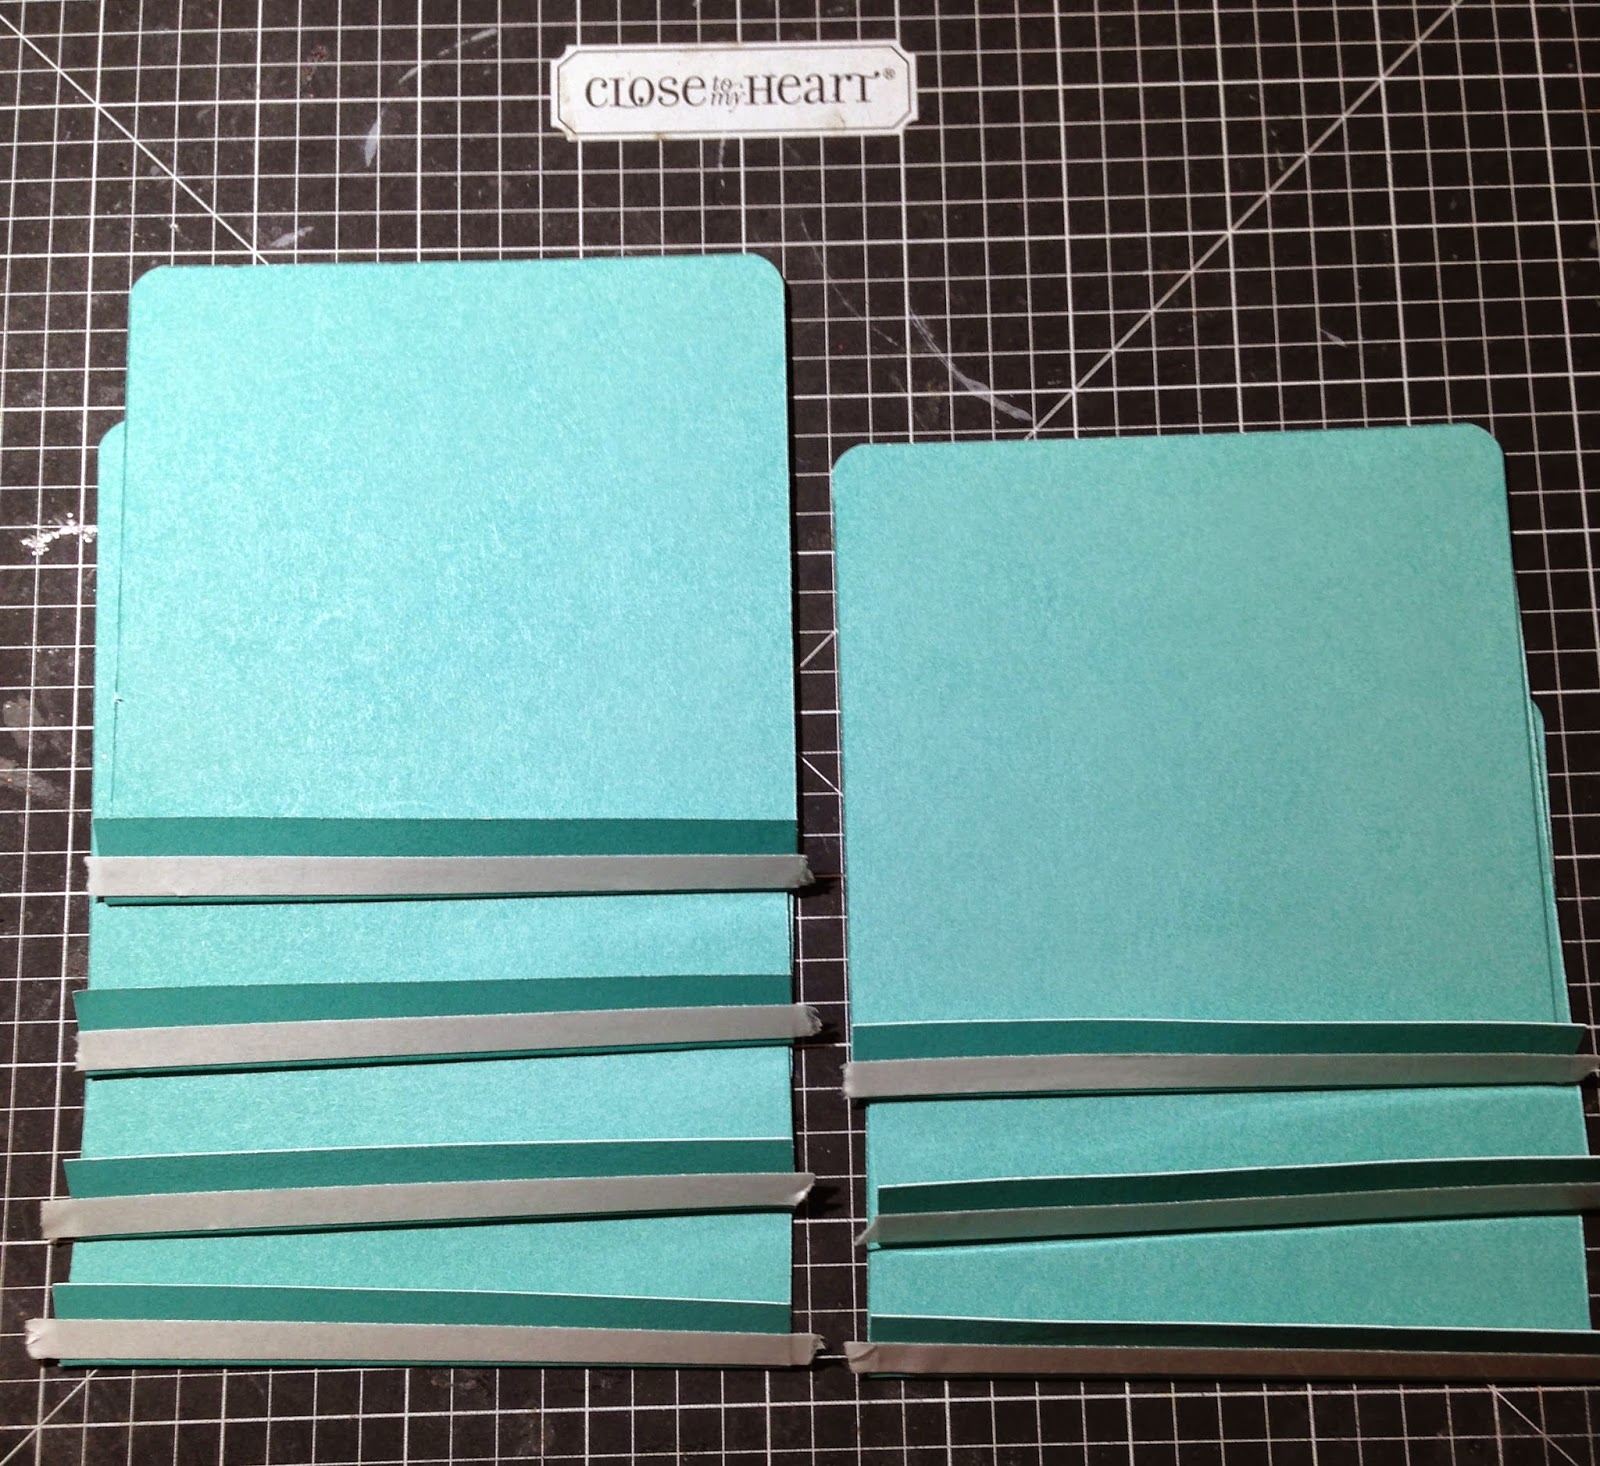
I used my corner rounder to decorate the edges and added double sided tape to each scored flap.

Start at the top of the card stock you adhered to the back cover of the book and adhere the 7 pieces of card stock making the waterfall effect.

You will need 15 pieces of patterned paper cut at 3 3/4 x 3 3/4 inches. I selected 5 each of 3 pieces of patterned paper. I also used the corner rounder on 2 of the edges and distressed the edges with black ink. Adhered the paper on the front and back side of the waterfall flaps. I plan to embellish the flaps with pictures and cute sayings from the girls throughout the school year.

You can make a pocket for the inside left side of the book. I cut a solid piece of card stock at 5 1/2 x 4 1/2. I scored on the 5 inch and 1/2 inch side. I put the none scored side diagonally in the paper trimmer to give it the pocket effect. I cut a piece of patterned paper slightly smaller to place on the front of the pocket.

Here is the inside with the pocket attached.

I added a couple embellishments to jazz up the pocket.

I cut out 3 tags using the CTMH Artiste cricut cart. I added strips of patterned paper, free hand doodling and ribbon to the tags.

Up close of the pocket and tags.

Up close of the water fall and patterned paper used.
Here is the embellished cover. I left a mat to add my girls 2014 school picture.

I folded this cool striped ribbon to add some flair to the cover. I love the paper and embellishments. I used CTMH Chalk It Up paper and embellishments as well as some polka dot washi tape.

This is a fun pocket holding the tags. The words celebrate school encouragement!! The tags can be easily used for bookmarks.

Now its your turn to get your Waterfall Folio making on!!! Happy Crafting!!
A+WESOME Shalana. You selected the perfect patterns and embellishments! I will put this folio on my 'Craft To Do List'. TFS the tutorial.
ReplyDeleteThank you kindly!! I would love to see yours when you have it completed :-)
DeleteDitto what Princess said!
ReplyDeleteThank you:-)
DeleteBeautiful job. Hope I get a chance to try it.
ReplyDeleteThank you!! Put it on you to do list and when you have a moment knock it out!! It was super fun and fairly easy to do :-)
DeleteLooks like and great project for school Pictures etc.
ReplyDeleteThanks Dainty!! Yes, I am in the school spirit with my girls going back to school :-)
DeleteShalana! This is fabulous!!! Thank you for sharing the steps to create it as well!!!
ReplyDeleteIt is wonderful! I will get on that tomorrow!
ReplyDeleteReally good job on this. Might be inspied to make one myself.
ReplyDelete