Showing posts with label Tags. Show all posts

Sunday, June 7, 2015

Tags for a Mission

Each summer my sweet Sistah Felecia Foster goes on a mission trip.  This summer she is traveling to Ghana West Africa.  Felecia is going to several schools so I made 100 tags for the children so they can have a little inspiration for their books.  I managed my paper scraps by pulling out those pads that were almost empty.  What made it exciting was using scriptures and words of inspiration decorating the front and an additional scripture on the back.  I pulled out die cuts, ribbon, lace, chipboard, punches, embellishments, ink and stamps.


Close ups

Close ups.  I made over 25 of the one in the middle for the boys with burlap.
Just imagine the difference we can make with a Boys and Girls club, Vacation Bible School or camp right in our own city.  Are you considering using your crafty ideas to help a group this summer?

It's Summer Time!  Let's share our talent and creativity.
Princess

Friday, February 6, 2015

GO RED!

Today is National WEAR RED DAY!  GO RED FOR WOMEN!

So I was inspired to create some tags.  I decided to add digital images by Robert Jackson that was just right for the event.  He had a few healthy living digis.  You can find them here.  He has already added images for Valentine's Day and Black History Month.  It's February right?!!

 This is the start of my effort to pile it on with embellishments.  Love making these tags.  It's a perfect way to use your scraps.  I'm adding some African American stamps.  Yes I recycle them after receiving mail for Black History Month projects!  Look at what I've started with (Sizzix die cut elephant, Forever Young cricut die cut, African American stamp, definition, word, and mini Martha Stewart elephant)

Check out these cute images?  I'm dealing with the first one now, but I did something about it this morning. Believe me when I say,  "Exercise does the body good!"  I'm patiently waiting for my next career and definitely want to be in shape.

It's February.  Do you have your Black History projects together?  Why not grab some die cuts and items from your stash and make tags?  They make the perfect gifts.

Happy Heart Day!
Princess

Wednesday, April 16, 2014

Creating with Julie Nutting Doll Stamps

Okay, I'm not really an image stamper. Sure, I've made cards and I have stamped on many of my layouts but that was mainly using sentiment, words or phrases and maybe a flower or two...you know the easy stuff. So when I decided that I just had to have all the great new doll stamps I knew it would require me to do a little more than just stamping.

I knew I would have to get markers or colored pencils if I wanted to create something with a little more color to them. But I found out that I don't have a lot of patience for sitting and coloring for long periods plus I didn't know a thing about how to get just the right color shades for skin or hair. So when I saw a post on SOC about using Gamsol with color pencils I knew that would work for me.

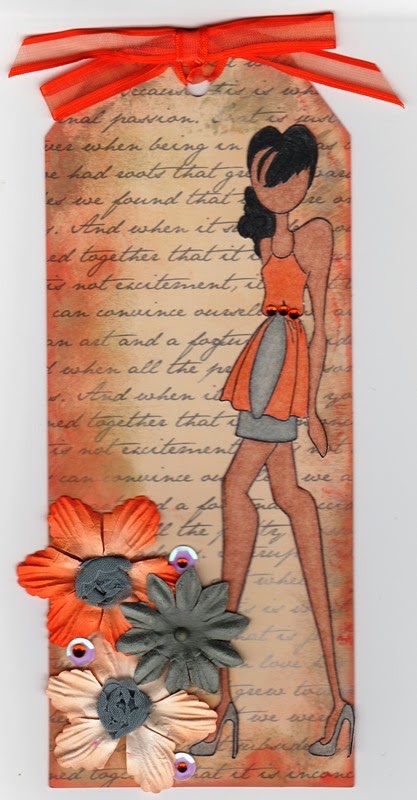
Here are two tags I made using doll stamp "Taylor" and "Shay". For Shay I actually did the coloring with Prismacolor Pencils and Gamsol. For Taylor I stamped on patterned paper, cut out the pieces and layered them on top of another stamp of the same doll. I also did the skin tone and hair color using the color pencils and Gamsol technique.

Shay Doll Tag


Taylor Doll Tag


Doll Tags by Tena E. Supplies - Doll Stamps: Julie Nutting (Prima); Tags & Flowers: Prima; Patterned Paper: Kaisercraft; Sequins: Teresa Collins; Rose Trim: Maya Road; Colored Pencils: Prismacolor; Stamps: Little Yellow Bicycle; Distress Inks: Tim Holtz.
 
I still need more practice with coloring  and blending but like how they turned out for my first try.
 
What's your favorite way for coloring in your stamped images? Please leave a comment and let me know...Happy Crafting!
 
Tena

Tuesday, March 18, 2014

St. Patrick's Day Tag!

Happy day after St. Patrick's Day!


I'm sure Mother Nature has her reasons, but up here in Ontario (Canada) we just went from being part of a "polar vortex" consisting of blizzards and crazy winter weather, to having above normal temperatures, and then going back to polar vortex craziness!

In times like these, it's difficult to think about seeing Spring anytime soon, so instead, I'm here with a St. Patrick's day themed tag!


The supplies I used were:
  • Graphic 45 "Place In Time" designer paper
  • Graphic 45 "Place In Time" chipboard embellishments
  • Tim Holtz Distress Ink "Seedless Preserves
  • Ranger Inksentials "Glossy Accents"
  • Scotch "Quick Dry Adhesive"
  • Copic "Spica Glitter Pens" 
  • Things from my stash:
    • Seam Binding
    • Lace Trims
    • Wooden Key embellishment 
    • Wooden #8 tag (6 1/4" x 3 1/8")
    • Foam 3D double-sided adhesive tape

FRONT of tag


To create the background on the front of the tag, I first cut a piece of the March foundation papers from the Graphic 45 "Place in Time" paper collection. I used the bottom right hand corner of the foundation page.
 Then I cut out a bunch of pieces from the March cut-apart page from the Graphic 45 "Place In Time" paper collection.
I layered the "St. Patrick's Day Greeting" tag from the cut apart sheet, on to the "March list" cut apart to give my tag a "title". I added seam binding to the tag before adhering it to the tag with some foam 3D adhesive.
I then added the chipboard flower layered over the tag with more foam 3D adhesive, and also added glossy accents to the centre of the flower.

In order to prevent the swirls on the background from getting too "lost" in the background, I decided to go over them with my gold Copic Spica pen to add shimmer to them. At the same time, I used my silver Spica pen to go around the edges of the flowers and shamrocks on the background for added effect.
I also decided to add some adhesive flat back pearls to the swirls to mimic round spots that were part of the swirl flourish.
At the bottom of the tag, I added a wooden key to add interest and at the very top of the tag, I added some narrow lace trim from my stash for added texture!

NB: I inked all paper and chipboard pieces in Tim Holtz distress ink "Seedless Preserves".

BACK of tag
 

I kept the back of the tag much simpler since I'm not yet sure how the tag will be used.

Using the leftovers from the March foundation page, I cut out two pieces that had the page border on them, and used them to add a border to the top and bottom of the back of the tag.
I used one of the cut-apart images from the aforementioned cut-apart sheet as the main image on the back of the tag and I added a chipboard tag to the bottom, which is where I will be writing my name and date. 


I added seam binding the chipboard tag before adhering it with hot glue to the tag.


Don't let the weather get you down!
It's National Craft Month, so use your stash and get creating!

I would love to see your seasonal tag creations and invite you to post a link to them in the comments below!!

Inspiration is all around us and I hope I've provided you with some today!

Happy Crafting!

Krafty Kerry signing off!
Kerry's Cool Creations

Sunday, February 16, 2014

Bag it & Tag it!

Hi everyone, I hope you're enjoying your Valentine's weekend. While I was organizing my new purchases from winter CHA and re-organizing some older products I came across a stash of small colorful bags. Somehow these little goodies have been overlooked...so I thought I would pull them out and create something. I paired them with tags from my stash or patterned paper I used to make tags also from my stash.


These little bags will make a great addition to any scrapbook layout for journaling, pocket page albums or you can use them as gift giving tags for any occasion. Just customize them with your favorite embellishments to fit your needs.

Bags & Tags by Tena Ellison. Supplies - Bags: Michaels (Party Supplies); Stamps: Teresa Collins, Stampabilities, Technique Tuesday; Embellishments: Teresa Collins, Recollections, Heidi Swapp, Jillibean Soup, My Mind's Eye, Prima; Ink: Ranger (Tim Holtz), Color Box.


Here's to all the forgotten treasures just waiting to be found.

Happy Crafting!

Tena

LinkWithin

Related Posts Plugin for WordPress, Blogger...